
How to Uninstall WordPress from cPanel

When you use WordPress with cPanel, you can take advantage of the best of both worlds. WordPress provides content management capabilities, while cPanel provides hosting and management tools. This makes it easy to create and manage your website without having to worry about technical details. However, there may be reasons why you’d want to have WordPress uninstalled. Whether you are looking to migrate from WordPress, sell your website, or just encountered a problem that just requires you to uninstall the CMS and start all over again? Whichever your reason for choosing to uninstall WordPress, we’ll be giving you a step-by-step guide on how to do it through cPanel. Uninstalling WordPress from cPanel: Step-By-Step Guide Uninstalling WordPress with cPanel is very easy – just a short click-through process. However, before you go through with it, it’s important to understand that it’s standard practice to create a backup for your site and deactivate plugins and themes. After deleting WordPress, you’ll also want to delete the WordPress database, and cleanup to optimize your cPanel. In subsequent writing, we’ll give a step-by-step guide to the entire process. Step #1 Backup Your Website Before uninstalling WordPress, it’s crucial to back up your website files and database. This ensures that you have a copy of your content and settings in case you want to reinstall WordPress later or move to a different platform. Log in to your cPanel account. Locate and access the “Backup” or “Backup Wizard” tool. Create a full backup of your website files and databases. This might involve creating separate backups for your files and your databases. Step #2 Deactivate Plugins and Themes If you have any active plugins or themes, it’s a good idea to deactivate and delete them before uninstalling WordPress. This helps prevent any leftover files or data. Log in to your WordPress admin dashboard (usually accessed through yourwebsite.com/wp-admin). Navigate to the “Plugins” section and deactivate all plugins. Go to the “Appearance” section and switch to a default WordPress theme (like Twenty Twenty-One). Step #3 Delete WordPress Files Now you need to remove the WordPress files from your cPanel account. This can usually be done through the “File Manager” tool in cPanel. Log in to your cPanel account. Locate and access the “File Manager” tool. Navigate to the directory where your WordPress installation is located (often in the public_html directory). Select all WordPress files and folders (excluding any backups you created earlier) and delete them. Step #4 Delete WordPress Database You’ll also want to delete the WordPress database associated with your website. Still in cPanel, locate and access the “phpMyAdmin” tool. Select the database associated with your WordPress installation from the left-hand sidebar. Click on the “Check All” checkbox to select all tables in the database. From the dropdown menu, choose “Drop” to delete all selected tables. Confirm any prompts. Step #5 Clean Up After removing WordPress, make sure to clean up any leftover files and optimize your cPanel account. Empty your trash or deleted files folder in the File Manager. Log out of your cPanel account. This is only a generic guide as the exact steps will depend on your hosting provider and version of cPanel. At any rate, you want to remember that this process is irreversible, so be sure to have backups of your data before proceeding. If you ever decide to reinstall WordPress, you’ll need to go through the installation process again. While that’s the case, you can also choose to uninstall WordPress from an FTP client (if you can’t access your WordPress dashboard), or through Softaculous if you have it installed before. Now let’s explore how to use these methods for WordPress uninstallation. Manually Uninstalling WordPress via FTP: A Step-By-Step Guide Use an FTP client to connect to your website’s server. Navigate to the directory where your WordPress files are located (often public_html). Delete all WordPress files and folders, except for any backups you’ve created. Access your hosting’s cPanel and locate the “phpMyAdmin” tool. Select the database associated with your WordPress installation. Drop (delete) all the tables in that database. Confirm the deletion and exit phpMyAdmin. Uninstalling WordPress via Softaculous: A Step-By-Step Guide Log in to your cPanel account. Look for the “Softaculous Apps Installer” or a similar option. Click on it to access the Softaculous interface. In the list of installed applications, find your WordPress installation. Click on the “X” icon or the “Remove” button next to your WordPress installation. Follow the prompts to confirm the uninstallation. Softaculous will remove the files and database associated with your WordPress installation. This is often the most recommended method for uninstalling WordPress especially as most people choose to install WordPress with Softaculous in the first place. More so, it does much of the work for you – just follow through with the uninstallation wizard, unlike through cPanel where you’ll need to delete things like database and WordPress files separately. Again, whichever method you’re using, you want to always make sure that a backup is created before commenting on the uninstallation process as it’s irreversible.
How to Clone a website in cPanel
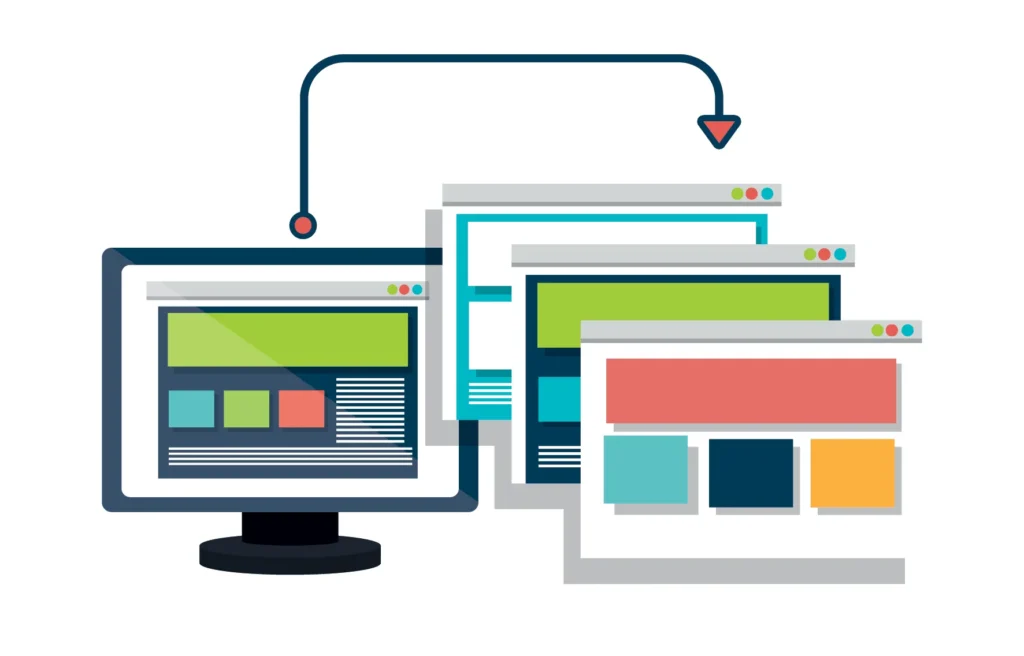
Are you looking to create a backup for your site? A safe environment to test changes? To get a new site? Or even mirror the existing one to target other geographic locations for profit maximization? Then closing your website is one of the most efficient ways to go about it – there’s no better way to do this than through the cPanel. While cloning websites is considered illegal if it’s not yours as it’s a copyright/trademark infringement, it’s necessary in some cases if you’re a developer who needs a clone of your website to achieve some objectives. In this article, we’ll go through a step-by-step guide on how own close a website using cPanel. Cloning a website in cPanel: A Step-By-Step Guide First, it’s important we understand that it is a manual process so it’s recommended you have a backup of your site before tampering with its cPanel. Moving forward, we’ll assume you’ve gotten a backup and can proceed to clone. Step #1 Copy the Website First, you want to log into your cPanel account and click on the “File Manager” icon. Next, In the left-hand navigation pane, expand the directory that contains the website you want to clone. Right-click on the website directory and select “Copy”. In the “Copy to” field, enter the name of the new directory that you want to create for the cloned website. Click on the “Copy” button Step #2 Extract the Website’s Database After you’re done copying the site, you’ll want to clone the database as well. To do this, simply click on the “MySQL Databases” icon in cPanel, click on the name of the database of the original website, and click the “Export” button. In the “Export Options” dialog box, select the “Structure and data” option and click on the “Export” button. The database for the original website will be exported to a file with the .sql extension. Step #3 Import the Database to your New (Clone) Site To do this, click on the “phpMyAdmin” icon in cPanel. In the left-hand navigation pane, expand the database for the new website. Click on the “Import” tab. Click on the “Choose File” button and select the .sql file that you exported from the original website. Click on the “Go” button. The database for the original website will be imported into the new directory. Your cloned website should now be ready to use. Now you can go about configuring the new database, adding a new user, giving privileges, and everything else. Cloning a Website with WordPress Toolkit: A Step-By-Step Guide If you’re looking for a relatively easier process, cloning with WordPress Toolkit in cPanel is arguably your best bet. Just following the process. Log in to your cPanel account. Click on the “WP Toolkit” icon. From the list of WordPress installations, locate the one you want to clone. Click the button to expand the entry. Click “Clone.” In the dialog that opens, select the following options: Target: Choose where you want to clone the website. You can create a new subdomain, use an existing domain or subdomain, or clone the website to a local directory on your computer. Database: Choose whether to create a new database for the cloned website or use the existing database of the original website. Data: Choose which data you want to clone. You can clone all data, including the website files, database, and settings, or you can select specific files or folders to clone. Click “Start.” WP Toolkit will then begin cloning the website. This process may take a few minutes to complete. Once the cloning process is complete, you will be able to access the cloned website at the URL you specified. Most site owners prefer this method as it automatically creates a new database and user for your cloned site, without having to do the traditional database settings. The only blemish here is that it only works for sites hosted on WordPress, non-WordPress users will need the previous tutorial to have their websites cloned. Why Would Anyone Want to Clone a website? There are several potential reasons that could warrant the cloning of a website, for the purpose of this article, we will be focusing on the legal reasons. ● For Educational Purposes Website cloning is one of the things taught to individuals learning web development. This helps them create a safe space to study the structure of their code, and functionality. It also gives hands-on experience on troubleshooting procedures that are expected to be known by every web developer. ● Efficient Methods for Monetization Sites Landing pages, affiliate marketing websites, and niche websites often use the same format. As such, most developers just clone something existing and make a few edits to suit the current purpose. It’s a lot faster than building the same thing from scratch when you know that they’ll contain pretty much the same number of pages/contents. ● Localization For websites intended for different language audiences, cloning allows you to maintain the core structure and content while adapting specific elements for different regions. ● Testing and Development The obvious reason – cloning a website provides a safe environment for testing updates, changes, or new features before implementing them on the live site. Developers can experiment with code changes, plugin installations, and theme updates without affecting the original site.
How to Use Elementor to Make a WordPress Website
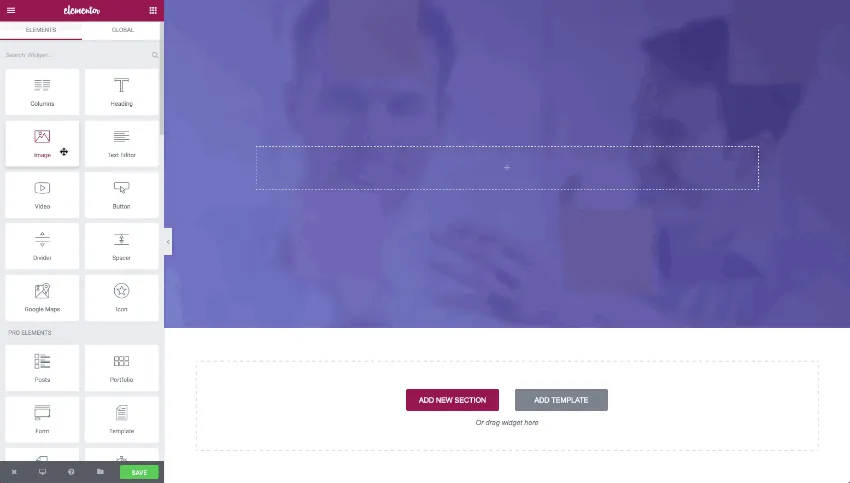
Are you interested in building a website, but have been deterred with thoughts of dealing with HTML and CSS codes? Well, we come bearing good news. You do not have to hand-code or hire professionals to build your website from scratch anymore. All you will require to build an amazing website is a plugin called Elementor. Elementor is a page builder plugin for WordPress, that allows you to build stunning webpages, using a visual editor and a drag-and-drop interface. Elementor not only allows you to build amazing web pages but also helps you create a complete website. In this guide, we will walk you through step-wise instructions on how to install the Elementor plugin on your WordPress website. We would also show you how to build webpages from scratch using this tool. Stick around! How To Install Elementor in WordPress Once you have your WordPress website set up and running with a chosen theme, there are two ways through which you can install the Elementor plugin. Just like most other WordPress plugins, installing Elementor is quick and simple. We would show you the two ways to do it below: Method 1: Installing via Elementor’s Website You can visit Elementor’s official website to download the page builder. Follow the steps below to get started: Visit Elementor.com and click on the “Get Started” icon. Fill in your email address and password in the designated spaces, and create an account. Answer a few questions about the ownership of the website, and your experience in building websites. Choose how you want to build your website. You can select the Elementor pro plugin, or opt for the basic free version instead. Enter your WordPress website’s domain name into their checker. Elementor requires that you have an active WordPress website. After your site has been confirmed, click “Install Elementor”. If you are already logged in, you will be taken directly to the Elementor plugin page. If you aren’t, you will be redirected to your website’s admin page, go ahead to log in. Click “Install Now” at the bottom right corner of the plugin page. Afterward, you will arrive at a page bearing a confirmation message. Click “Activate Plugin”. Congratulations, you are all set up! Method 2: Installing Elementor via WordPress Dashboard Rather than installing from their website, you can also install Elementor directly from your WordPress dashboard. Follow the steps below, to discover how: From your WordPress dashboard, click on Plugins > Add New Enter “Elementor” in the search bar, and locate Elementor Website Builder Click “Install Now” After the installation is completed, click “Activate”. The page builder plugin would be automatically added to your sidebar. Elementor Basic Free Version Vs Elementor Pro Pricing Elementor offers a free, basic plan as well as multiple paid pro subscription plans. The free plan comes with all the tools you will need to create an engaging website, such as a drag-and-drop visual editor, 40+ basic widgets, and 30+ template options. However, if you want more licenses, advanced functionality, and 24/7 support, you can upgrade to one of the tiers on the pro version. The Elementor pro version pricing plans are tiered as follows: Essential: With Essential, you get Elementor Pro on 1 website, for $49/year Advanced: With Advanced, you get Elementor Pro on 3 websites, for $99/year Expert: With Expert, you get Elementor Pro on 25 websites, for $199/year Studio: With Studio, you get Elementor Pro on 100 websites, for $499/year Agency: With Agency, you get Elementor Pro on 1000 websites, for $999/year For individuals and small teams, the Expert plan is known to offer the best value all year round. However, if you are a bit skeptical, you can always start up with the Essential plan, and upgrade to Advanced or Expert later on, if need be. While the Elementor Pro plan offers several desirable features that speed up your workflow, and give you better control over the appearance and functionality of your website, you certainly do not need the additions to make a great website. If none of the paid subscription plans rock your boat, the basic plan works just as well. How To Use Elementor Page Builder With all that said and done, let’s get into the nitty-gritty of how Elementor works. With this tool, you can create several webpages by working with one of the ready-made templates, available to choose from. Let’s explore what it looks like to start with the basics. Step 1: Create A New Blog Post or Page Navigate to the dashboard of your WordPress website, and click on “Add New” under posts or pages. Step 2: Edit with Elementor While you can decide to edit the new page you’ve created with the default WordPress editor, you can likewise edit with Elementor. To do this, click on the “Edit with Elementor” icon displayed on the screen. Step 3: Drag-and-Drop Elements Initially, the main page will be blank. However, you can pick, drag and drop elements from the Elementor sidebar. For instance, to create a new heading for the page, click on the box that says “Heading”. Hold down the mouse, and drag it to the widget area on the page. You can customize the structure of that section by clicking the little “+” button. You can also add video elements to this section. Step 4: Edit Settings For every element you add to the page, you can customize its content, style, margins, responsiveness, and so on, by clicking on the six dots. Step 5: Publish Your Page Once you are satisfied with the contents and settings of the page, you can go ahead to check the preview of the actual page on the editor, and then publish! Conclusion This guide barely scratches the surface of all the features Elementor avails you. The page builder summary above only shows you how easy it is to place elements and create a website that works. You can build custom themes, add pop-ups, build WooCommerce pages, and even create a mobile responsive website, all
How to Add Google Analytics to WordPress Site
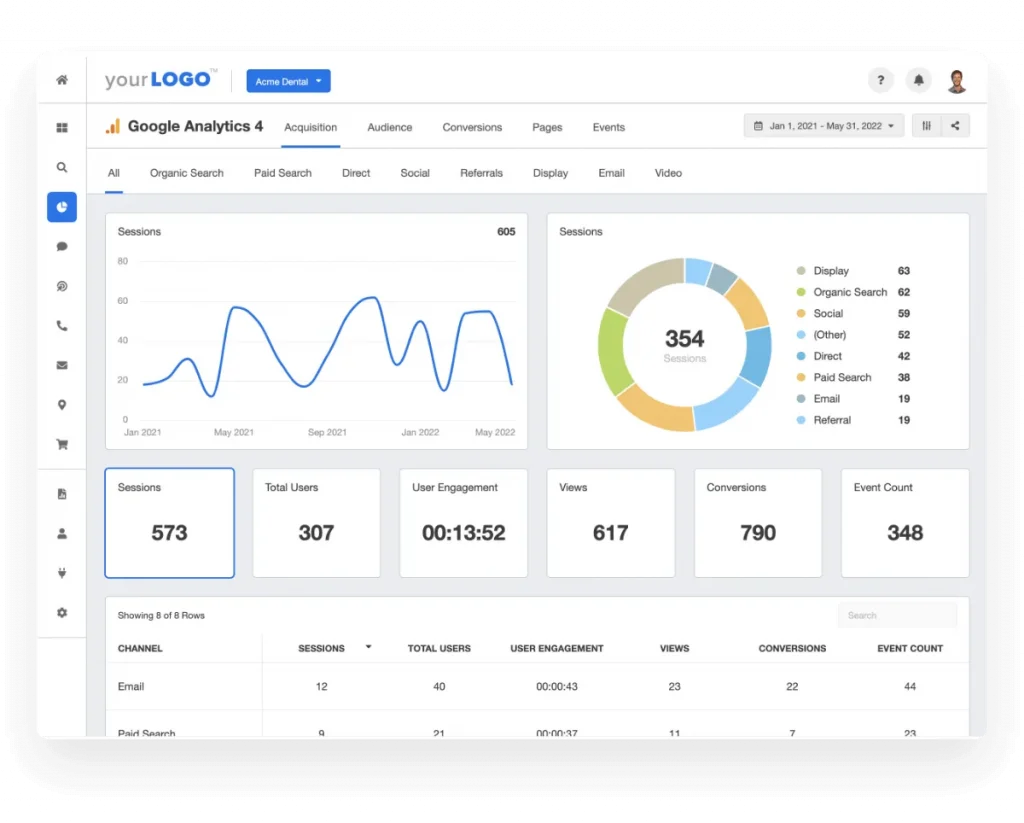
Knowledge of how users interact with your website is crucial for the success of your marketing campaigns. Having details on your website’s traffic would help you customize your posts to attract your target audience, and then convert them to leads. Several tools can help generate a detailed analysis of the various website traffic parameters. However, among the many tools, Google Analytics for WordPress is arguably one of the best you can get around. In this guide, we would discuss the importance of Google Analytics to website owners, a step-by-step guide on how to create a Google Analytics account, and lastly, how to install Google Analytics to WordPress. Importance of Google Analytics If you are a blogger or website owner, Google Analytics helps to grow your website by showing you the statistics that matter and helping you make data-centric decisions. The following is some of the key information that Google Analytics provides you, for free: 1. Who Visits Your Website This provides information on the geographical locations of your website visitors. This part also provides additional information, such as the browser that was used to access your site, screen resolution, JavaScript support, and so on. This analytic can be extremely useful in creating customizable websites, that would be better suited for your target audience. 2. What Do Your Audience Do On Your Website With Google Analytics, you can track what section of your website users frequent, how long they spend on your website, and the percentage of those that leave your website on their first visit (bounce rate). This information can help reduce your bounce rate and generate more views on your page, by pushing out content that would appeal to your users. 3. When Do You Get the Most Traffic On Your Website Having information on your site’s hottest hours of the day can help you select the best time to push your content out. If the timeframe is not compatible with your time zone, you can adjust your schedule to suit the time. 4. How Do Your Target Audience Find Your Website Have you ever wondered where your users access your websites from? Search engines, direct links, or perhaps, referral sources? This part of the analysis gives you a percentage breakdown of each of these sources. That way, you can create exclusive content for the source where most of your users come from. 5. How Do Your Audience Interact With Your Website Google Analytics also helps show you how users interact with your website’s features, like the percentage of those that click the links on your site and much more. How Can I Add Google Analytics To WordPress? Adding Google Analytics to WordPress involves two major steps: Creating a Google Analytics Account, and Installing Google Analytics to WordPress. In this section of the guide, we would walk you through a step-by-step process on each step. A. Creating A Google Analytics Account Google Analytics is available to users all around the world. All you require to sign up is a Google or Gmail account. Follow the steps below to create a Google Analytics account, as you kick-start your journey of adding Google Analytics to WordPress. Step 1: Visit the Google Analytics Website On the site, click the “Get Started Today” button Next, sign in using either your Google or Gmail account. If you already have one, you can use that to sign in. However, if you do not have any, you can go ahead to create an account for yourself. Step 2: Sign-up For Google Analytics With Your Gmail/Google Account After signing in with your Gmail or Google account, a welcome screen would pop up. Click the “Start Measuring” button After that, provide an Account Nameand personalize your data-sharing settings (which can be left as default). Step 3: Create a Google Analytics Property To start, enter a Property Name, and select your Reporting Time Zoneand Currency Thereafter, click the “Next” button On the next screen, select Industry Category, and choose a business size Next, select your preferred options for using Google Analytics Then, click the “Create” button, and check the box signifying your consent to the terms of the Service Agreement. Next, click the checkboxes for email communication updates you wish to receive, andclick “Save”. Step 4: Select the Web Stream Option Select “Web” as the platform and enter your website URL and stream name. Next, click the “Create Stream” button. Now that you have successfully created a Google Analytics account, let’s walk you through the steps involved in installing Google Analytics to WordPress. B. Installing Google Analytics To WordPress Google Analytics can be installed by any user, with mild technicalities involved. There are several methods through which the installation can be carried out, and we would enumerate the steps involved in four methods. Method 1: Add Google Tag Code to Header.php You can add Google Analytics to WordPress by copy-pasting your Tracking Code to your website code (in the “header.php” file). Follow the steps below: On your WordPress dashboard, click “Appearance (Editor)” Click the “header.php” file Copy your tracking code from Google Analytics, and paste it into the header code. Wait until the installation is fully activated. This can take up to 48 hours. Method 2: Install Using WordPress Plugin WordPress plugins are an excellent alternative. There are several plugin solutions however, we would consider the best two: GA Google Analytics for WP, and Monster Insights. GA Google Analytics For WP Go to your WordPress dashboard Click “Add New Plugin” Type “GA Google Analytics” inthe search box Click “Install Now”, and then activate the plugin Click “Plugjn Settings”, and copy and paste the Tracking ID Click the “Save Changes” button. Monster Insights Install and activate the plugin following the steps listed above Head over to the Plugins Settingspage, and link it to your Google Analytics account Click the “Connect Monster Insights And Setup Web Analytics” button, and run the setup Select your site’s category Connect and authenticate your Google Analytics account with Monster Insights Click “Save and Continue” Method 3: Use Google Tag Manager Navigate your dashboard, and click